

Deploy Django webapp to EC2
Contents
- 1. Introduction
- 2. Create an EC2 instance
- 3. Connect EC2 and set up the code + environment
- 4. Open port 8000 and access
1. Introduction
Annyeong haseyo, in this post, I’ll guide you on how to deploy a Django webapp (a love confession website) to EC2.
2. Create an EC2 instance
To create an EC2 instance, follow these steps:
- Open AWS Console and go to EC2. Make sure you deploy the webapp in a region close to your country.
- On the EC2 dashboard, click the Launch Instance button.
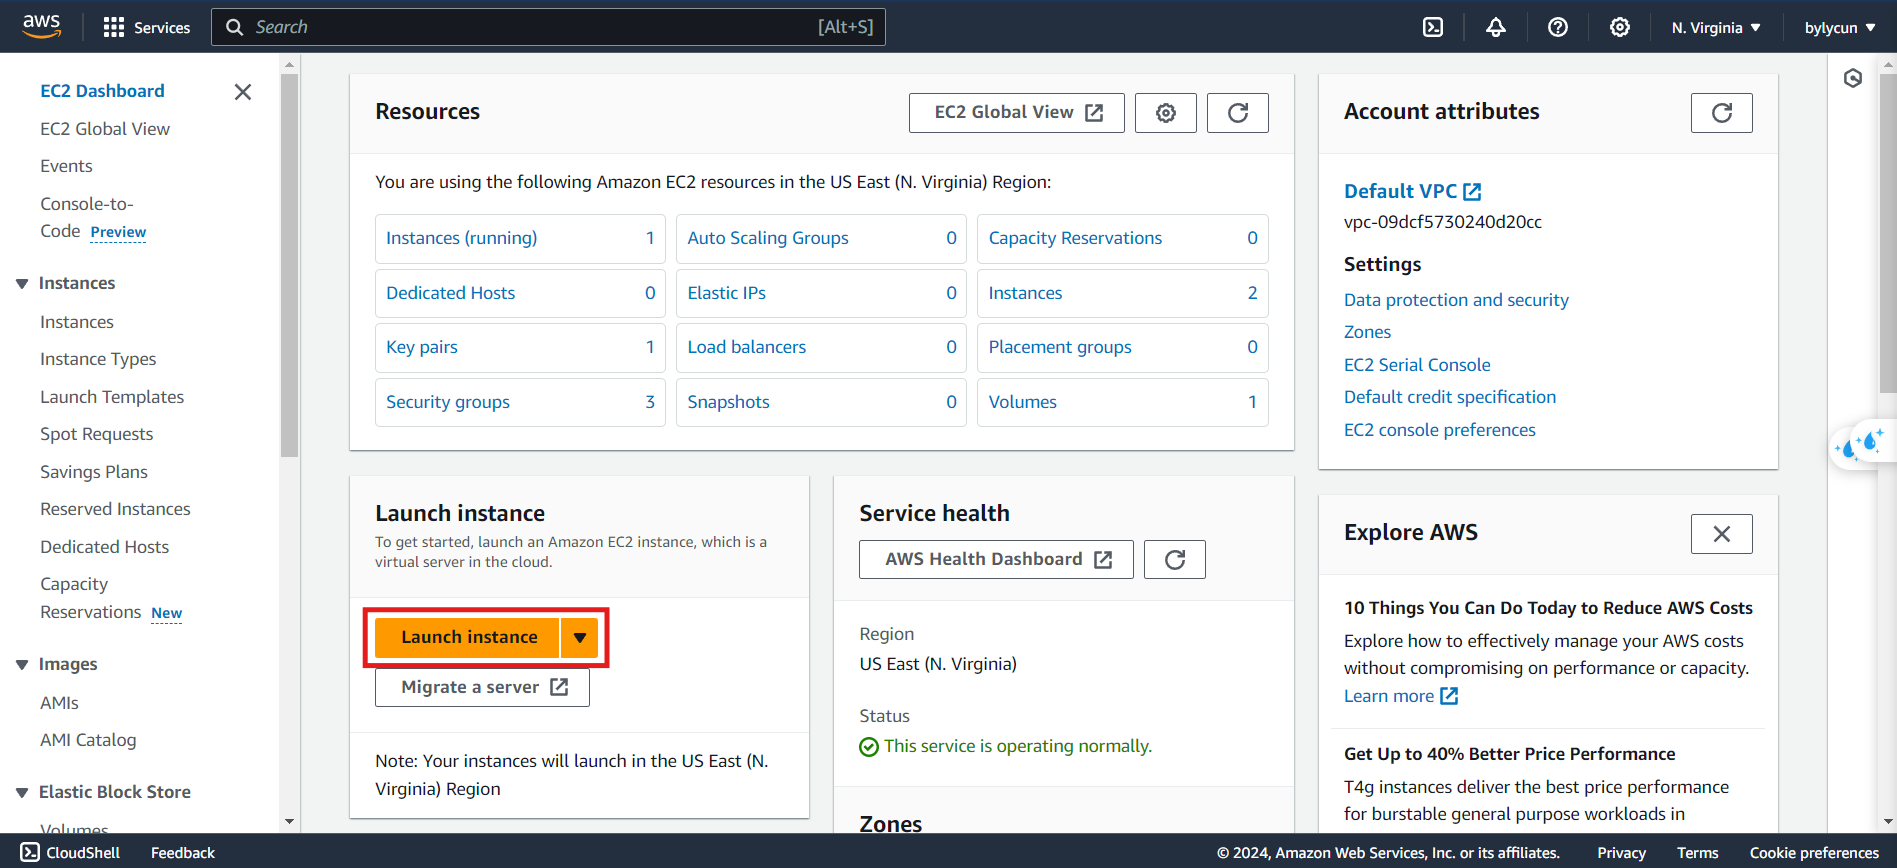 Figure 1. EC2 Dashboard.
- Name the instance and click Launch Instance. The default OS image is Amazon Linux 2, and the instance type is t2.micro (Free Tier).
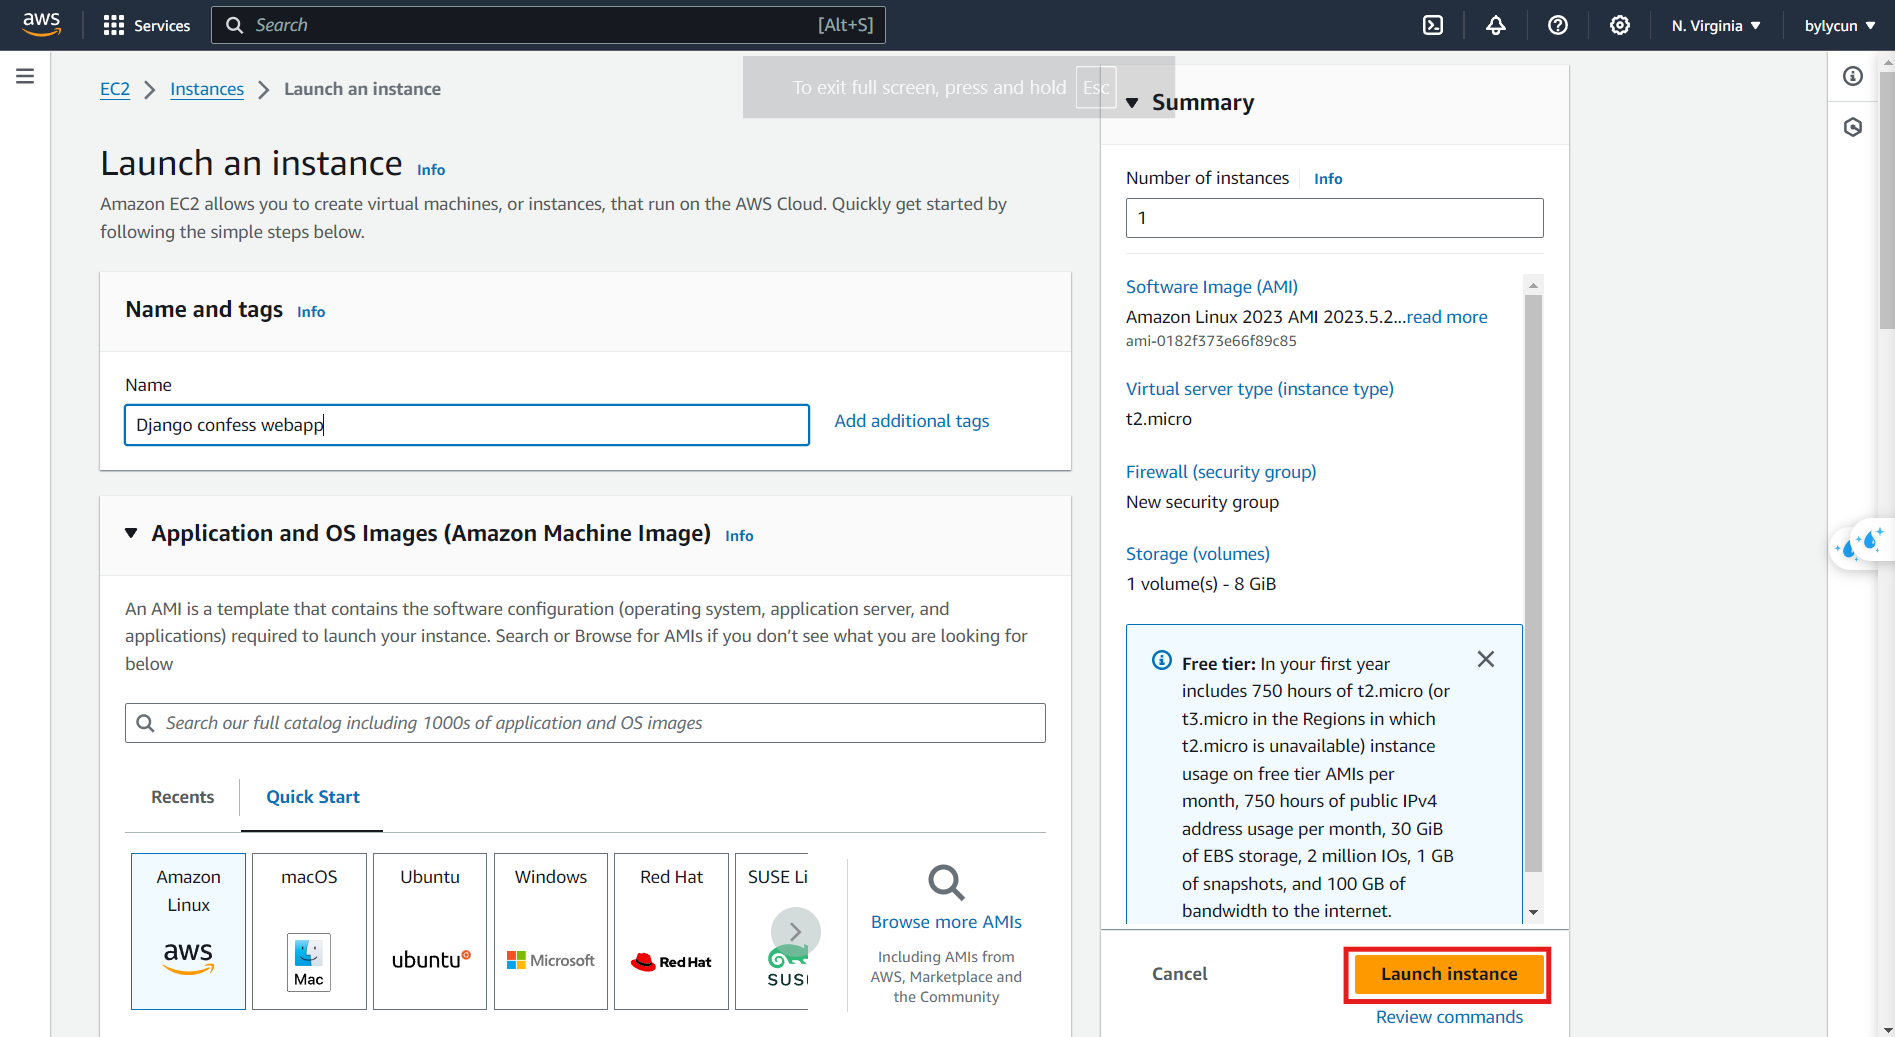 Figure 2. Fill in the details.
- Choose an option for the key pair (since this is just a test app, I won’t create one, but it’s not recommended).
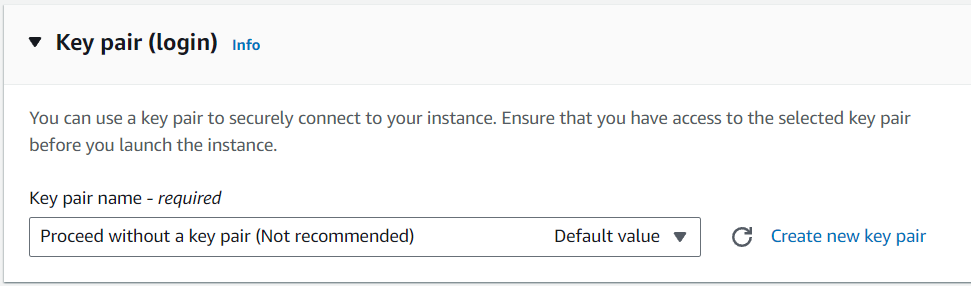 Figure 3. Key pair option.
- Press Launch to create the instance.
Now that the instance is created, let’s set it up.
3. Connect EC2 and set up the code + environment
- Open the instance details and click on Connect.
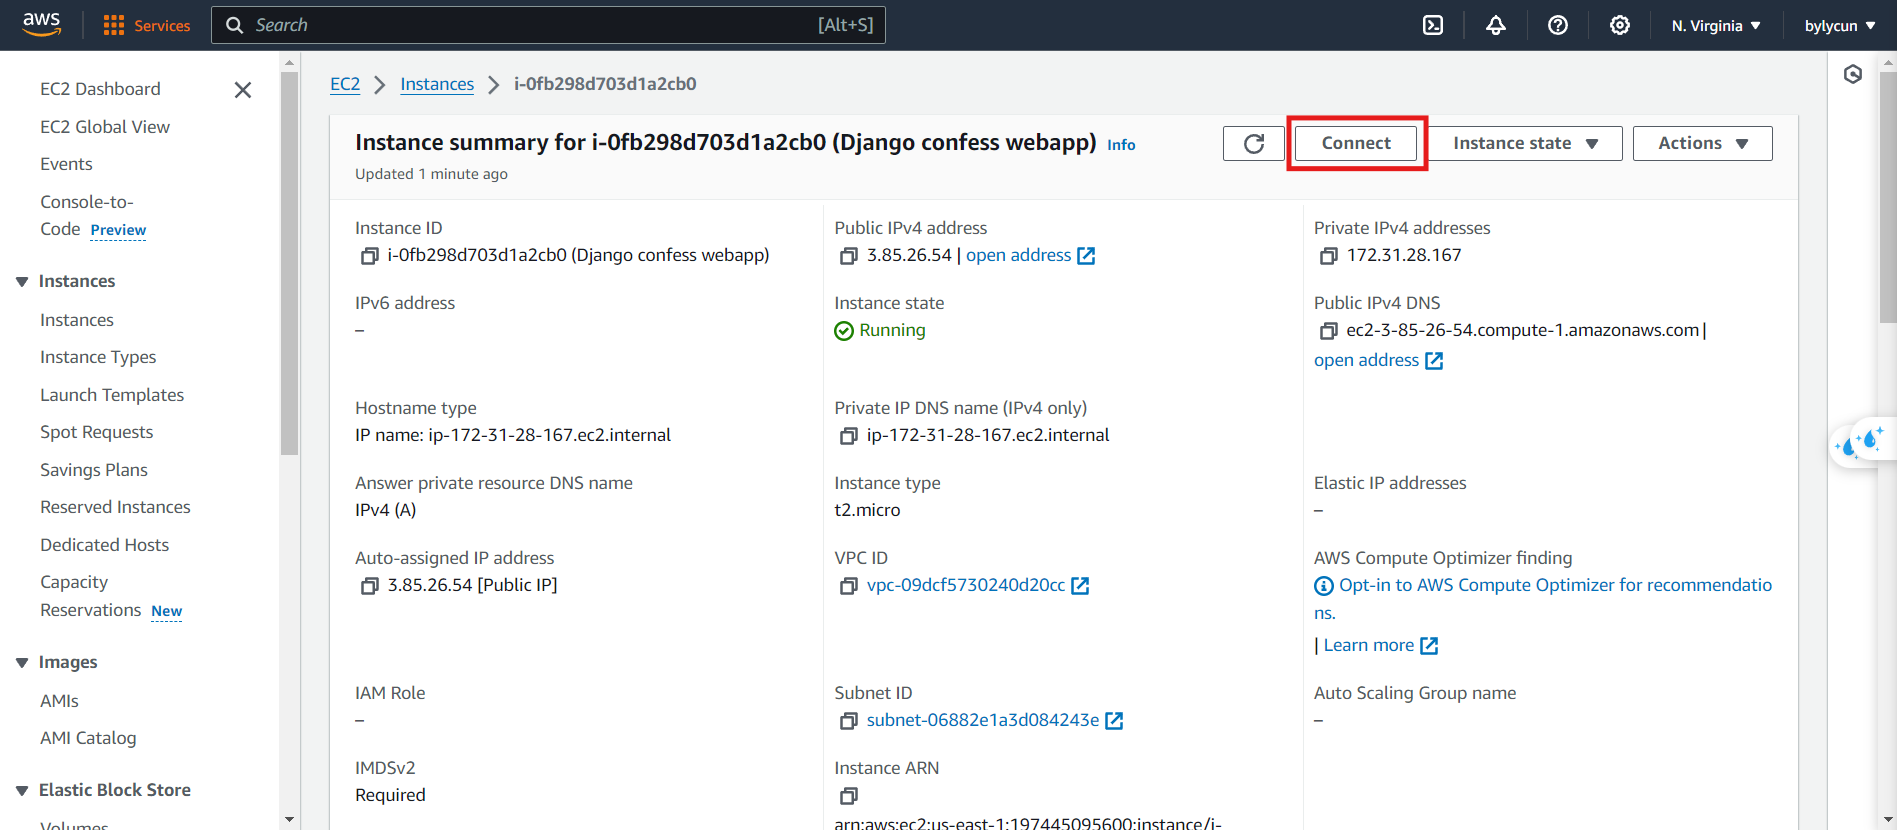 Figure 4. Connecting to the instance.
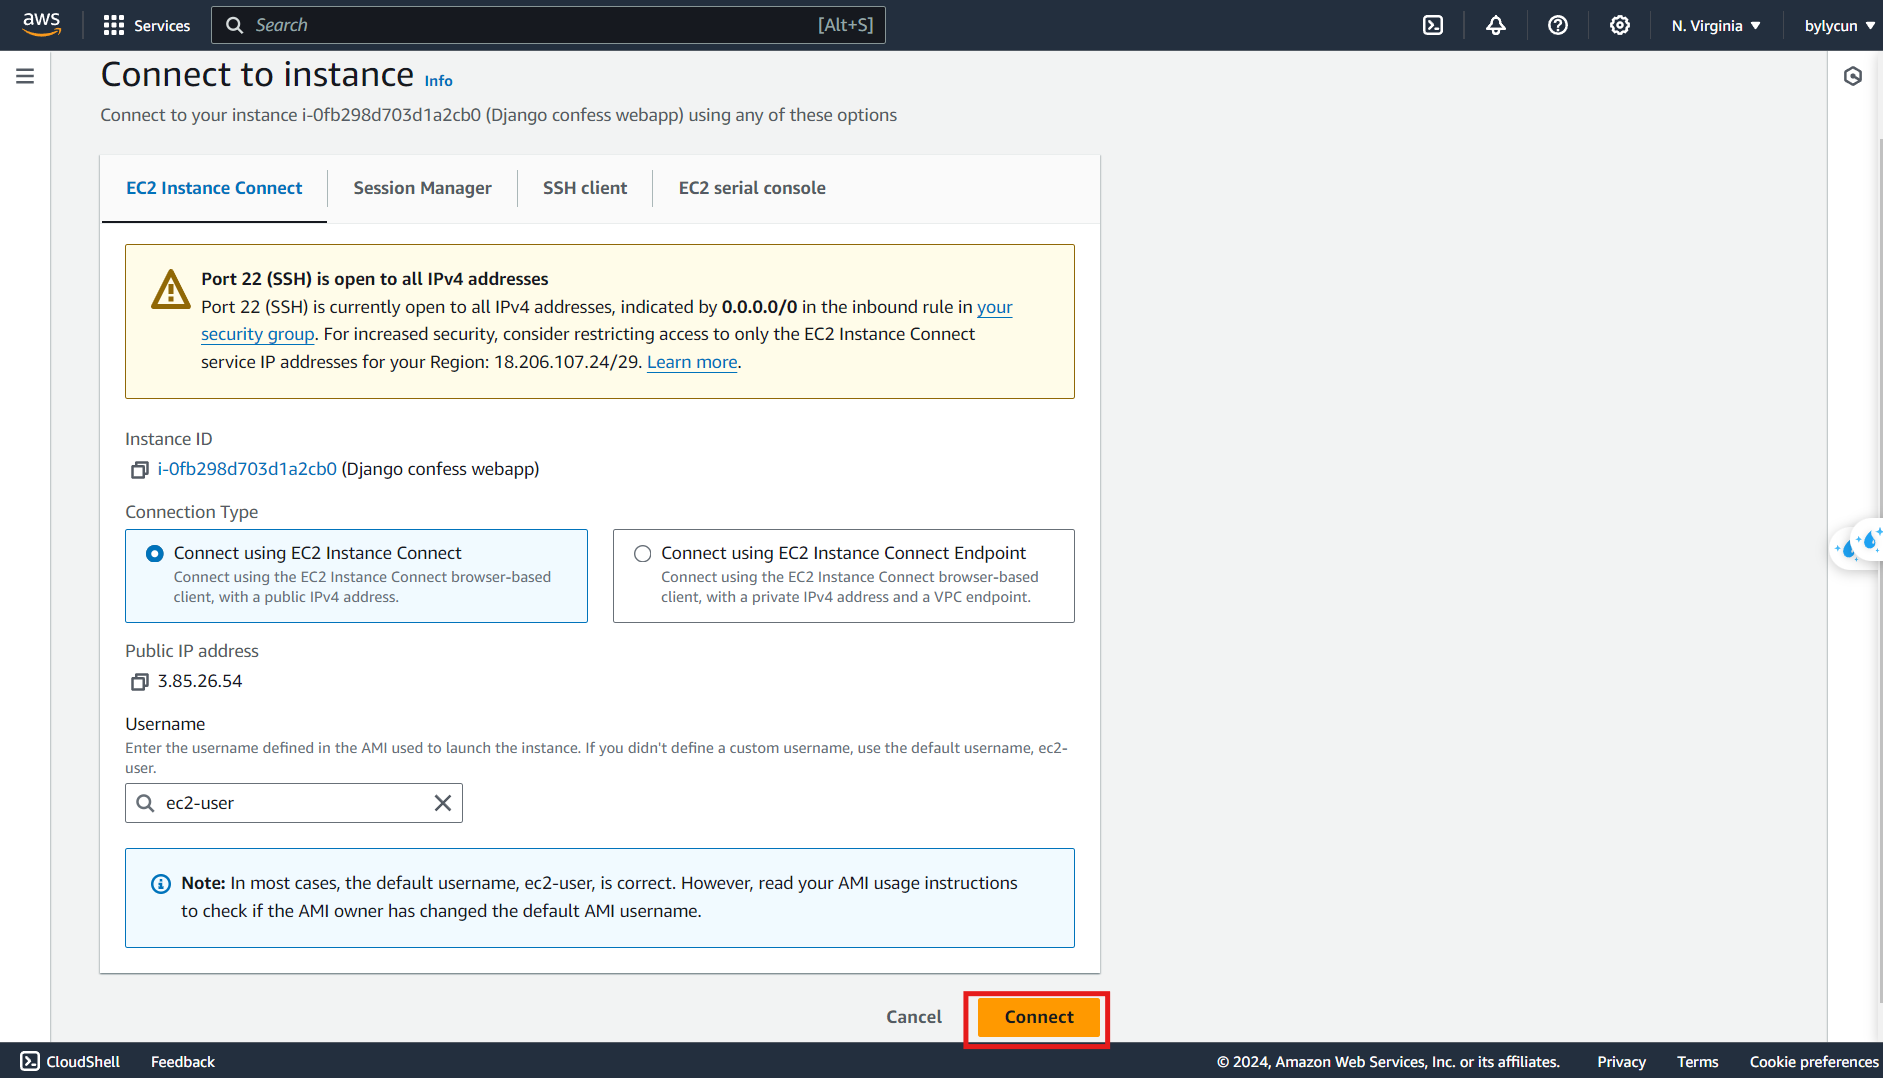 Figure 5. Connect via web browser for convenience.
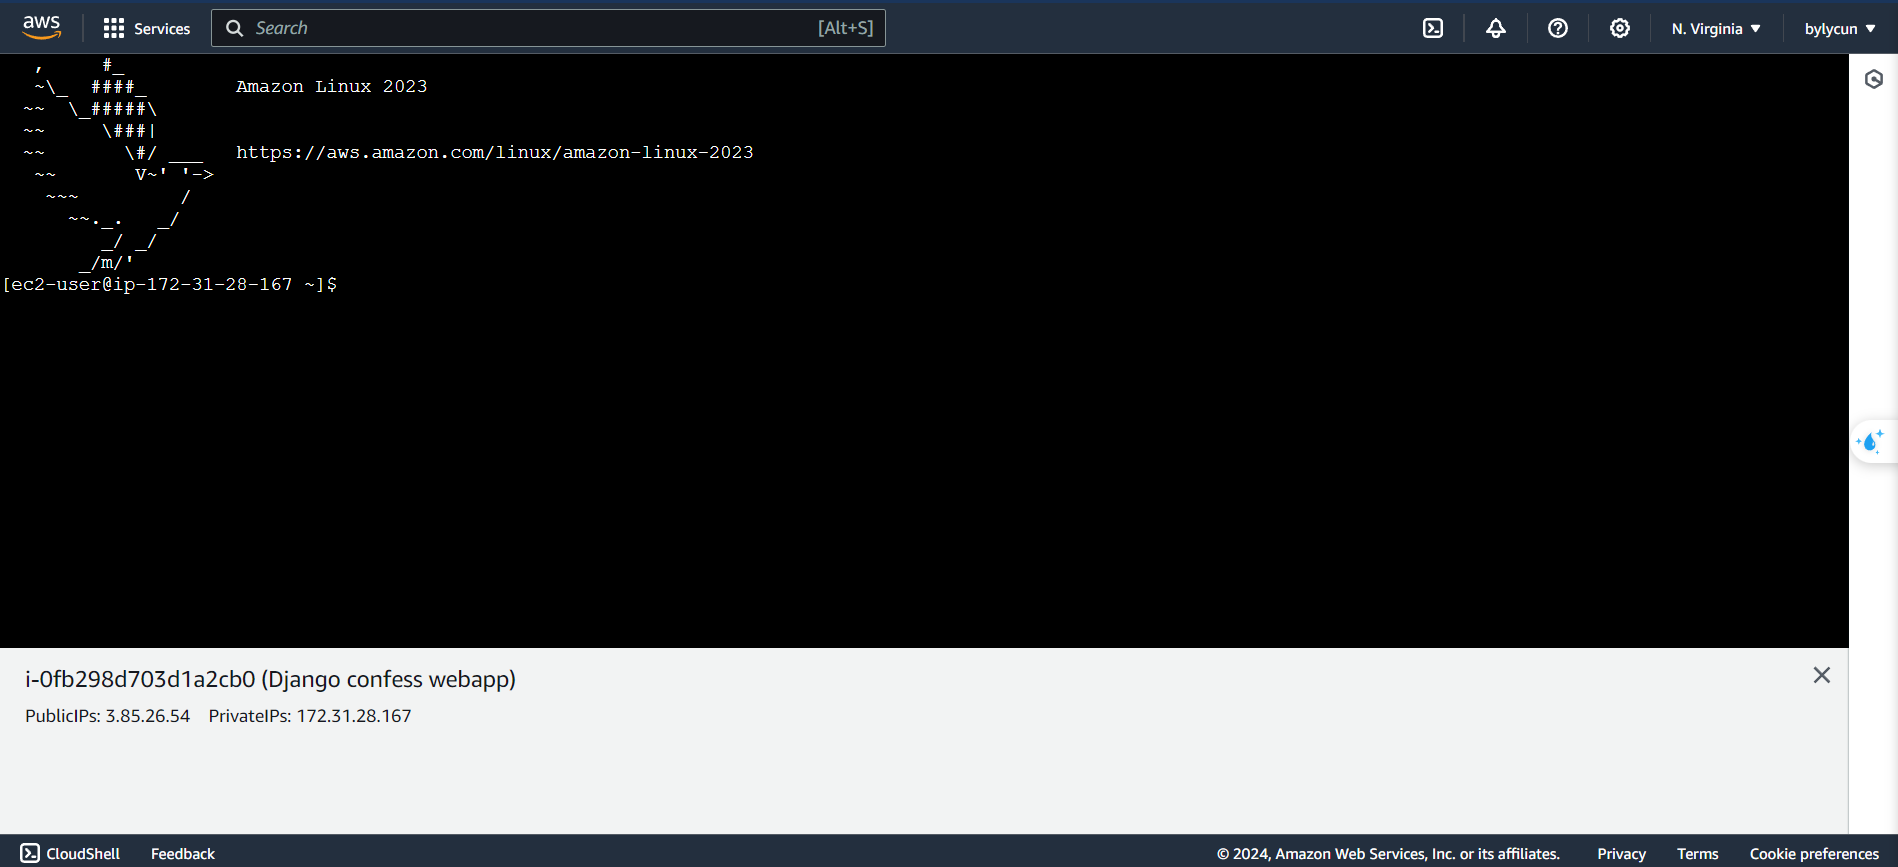 Figure 6. Connection ready.
Let’s set up the environment for the instance:
- Update the system:
1
 sudo dnf update -y
- Install git:
1
 sudo dnf install git -y
- Install pip:
1
 sudo dnf install pip -y
- Install gunicorn:
1
 sudo pip install gunicorn
Now, let’s clone the code and continue the setup:
- Clone the repo from GitHub:
1
 git clone https://github.com/frogdance/confess
- Install the required libraries:
1
2
 cd confess
 pip install -r requirements.txt
- Host the website:
1
 gunicorn --bind 0.0.0.0:8000 gift.wsgi:application
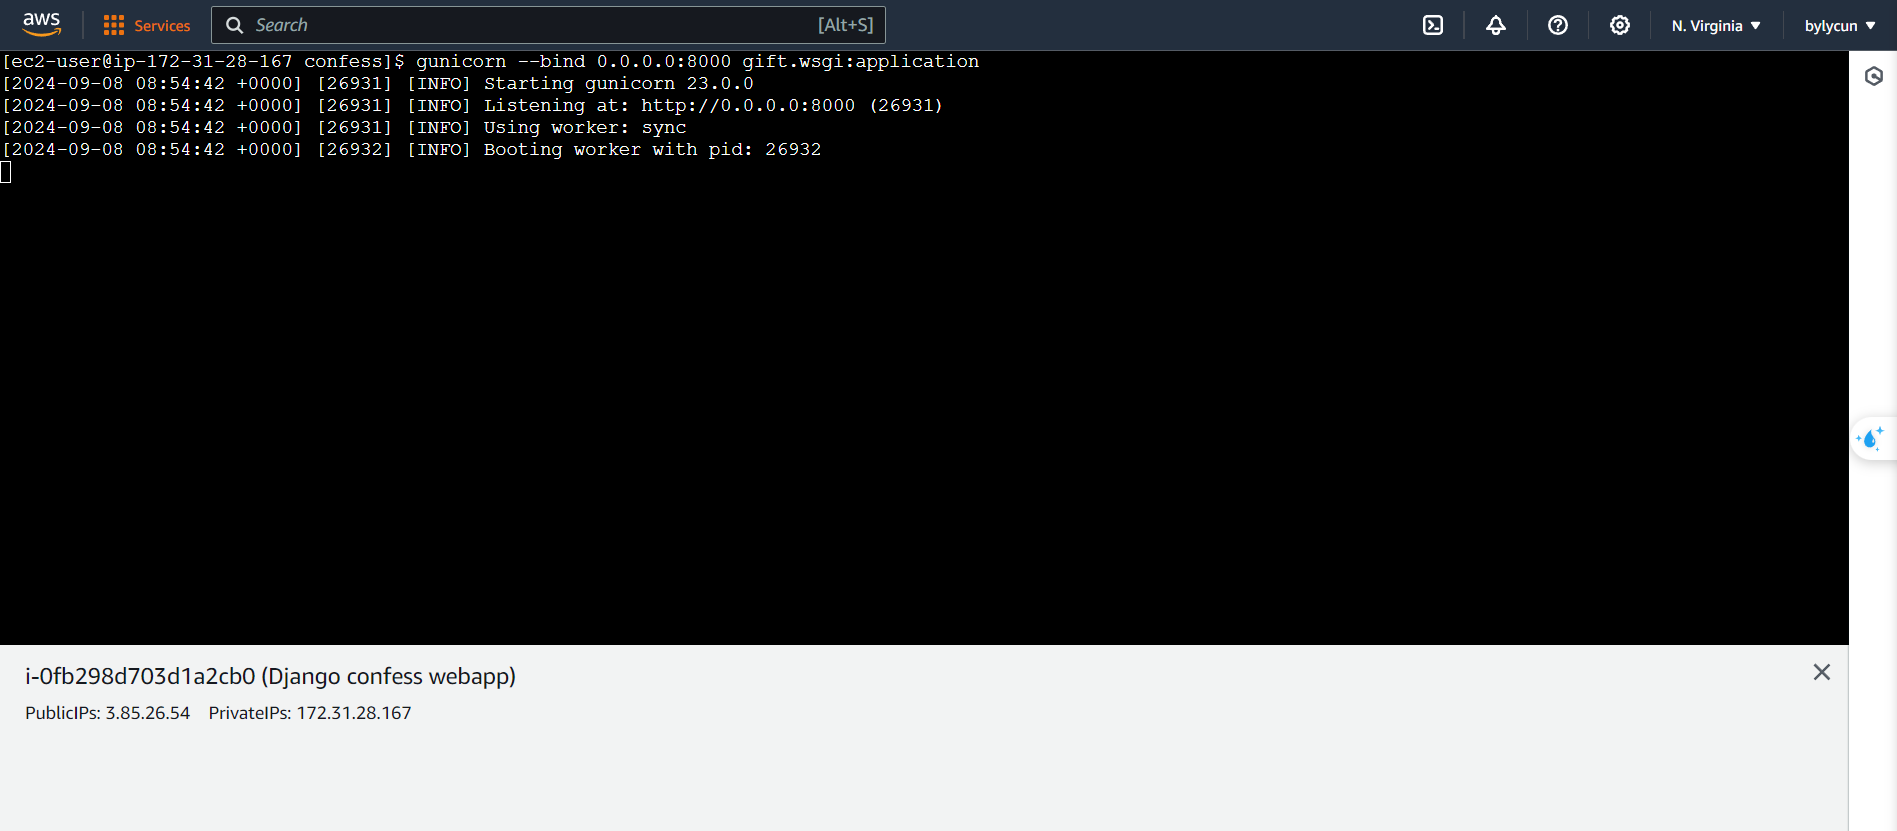 Figure 7. Hosting success message.
4. Open port 8000 and access
Next, we’ll open port 8000 for the instance. Here’s how:
- Open the instance details, go to the Security tab, and click on the instance’s security group.
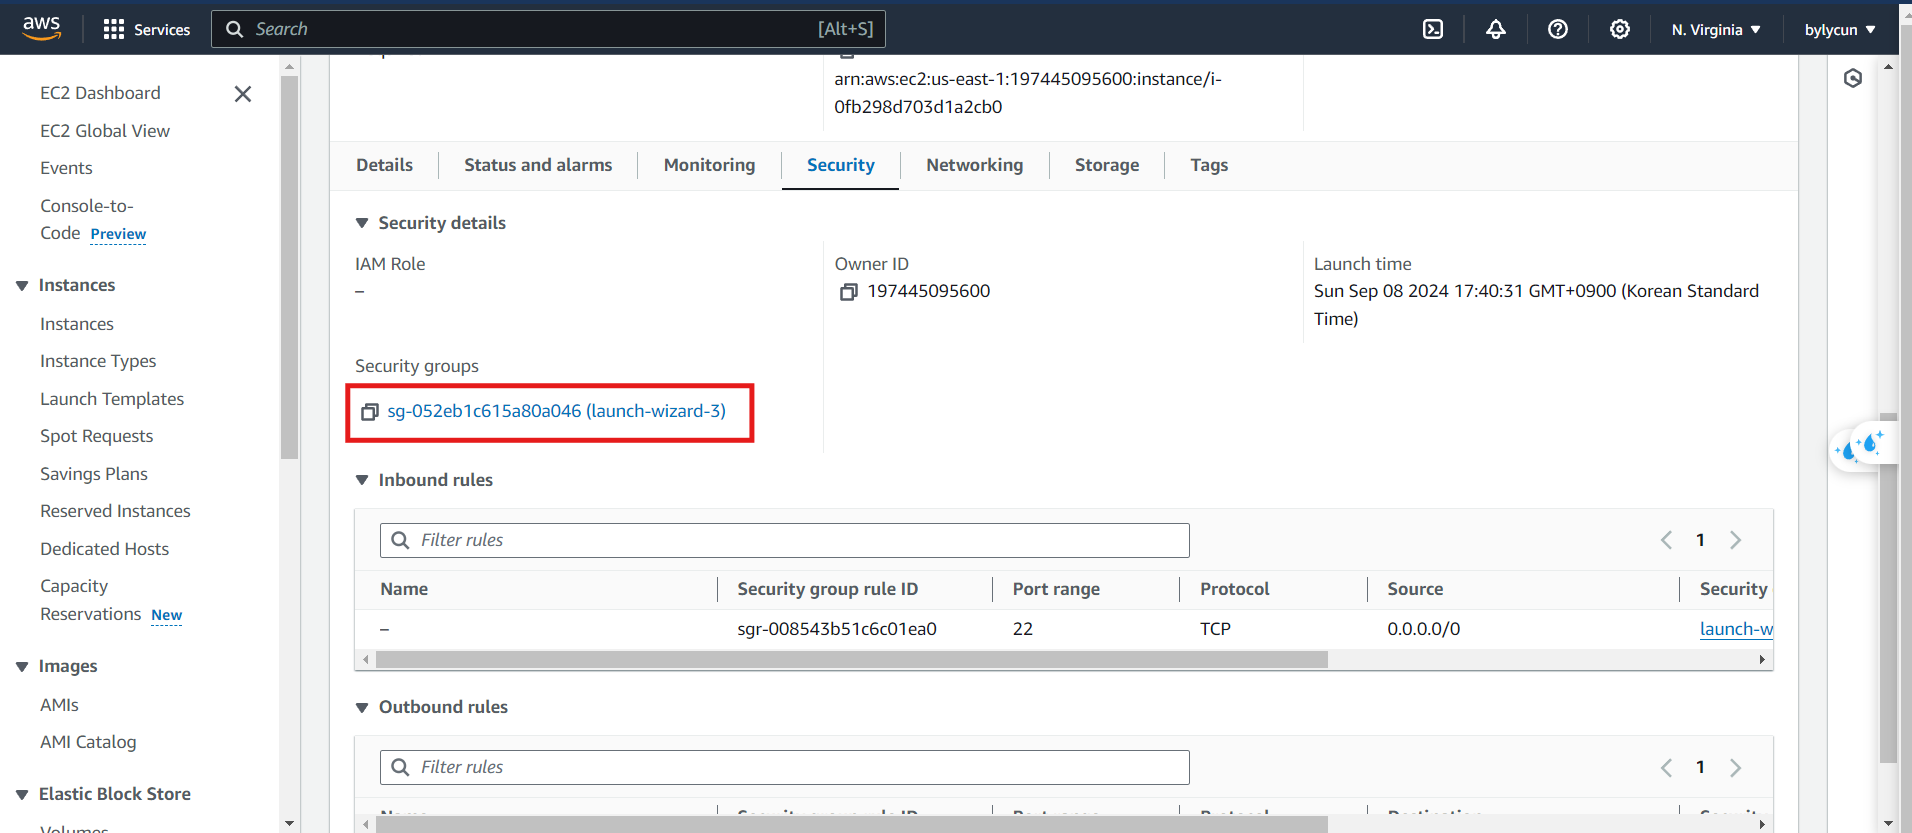 Figure 8. Security group details.
- Click Edit inbound rules and open port 8000.
 Figure 9. Editing inbound rules.
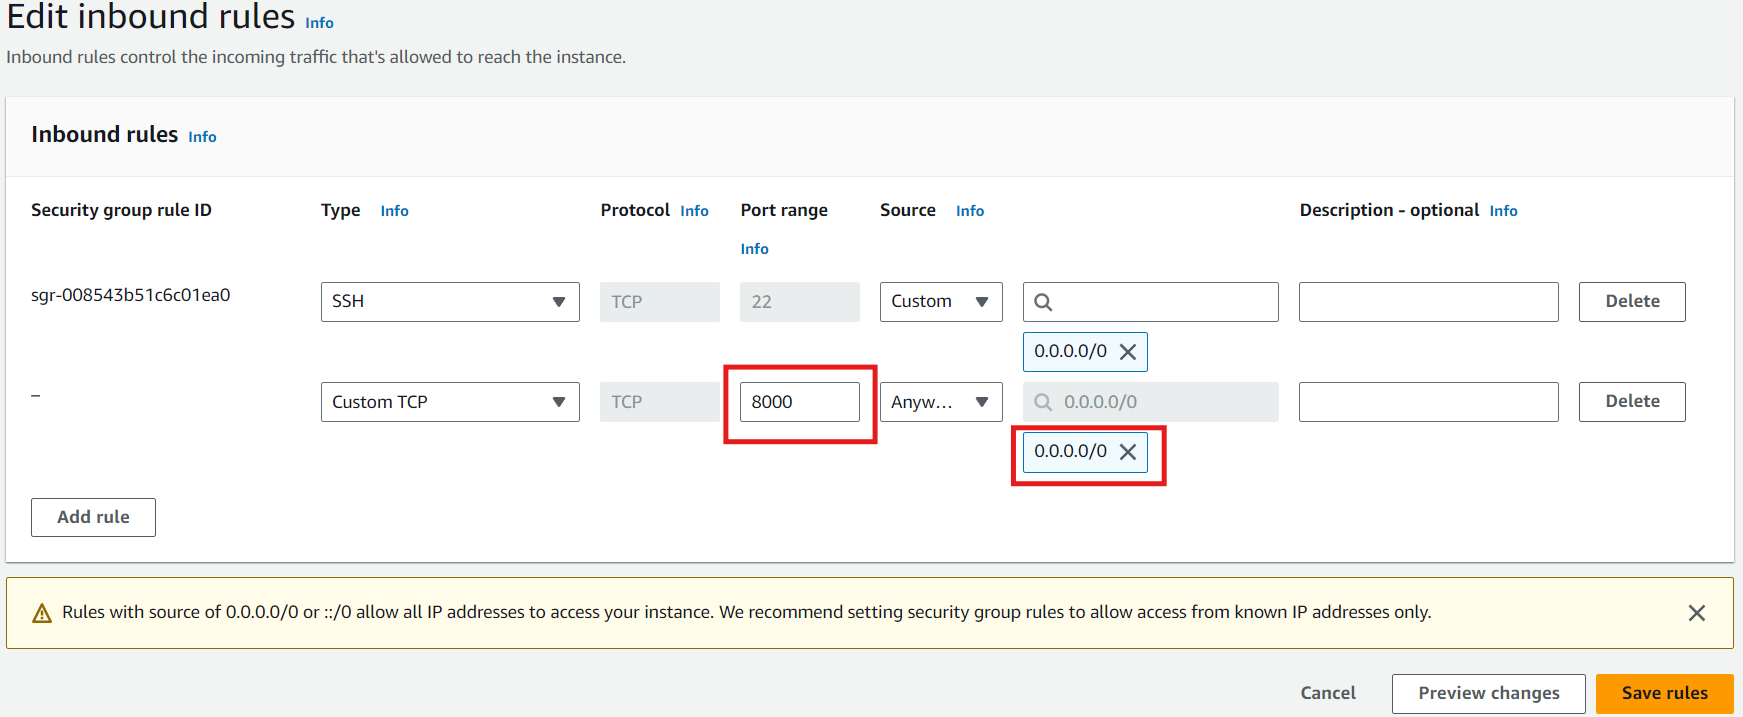 Figure 10. Set the rules as shown.
After that, click Save rules.
- Open the webapp to check if it’s working.
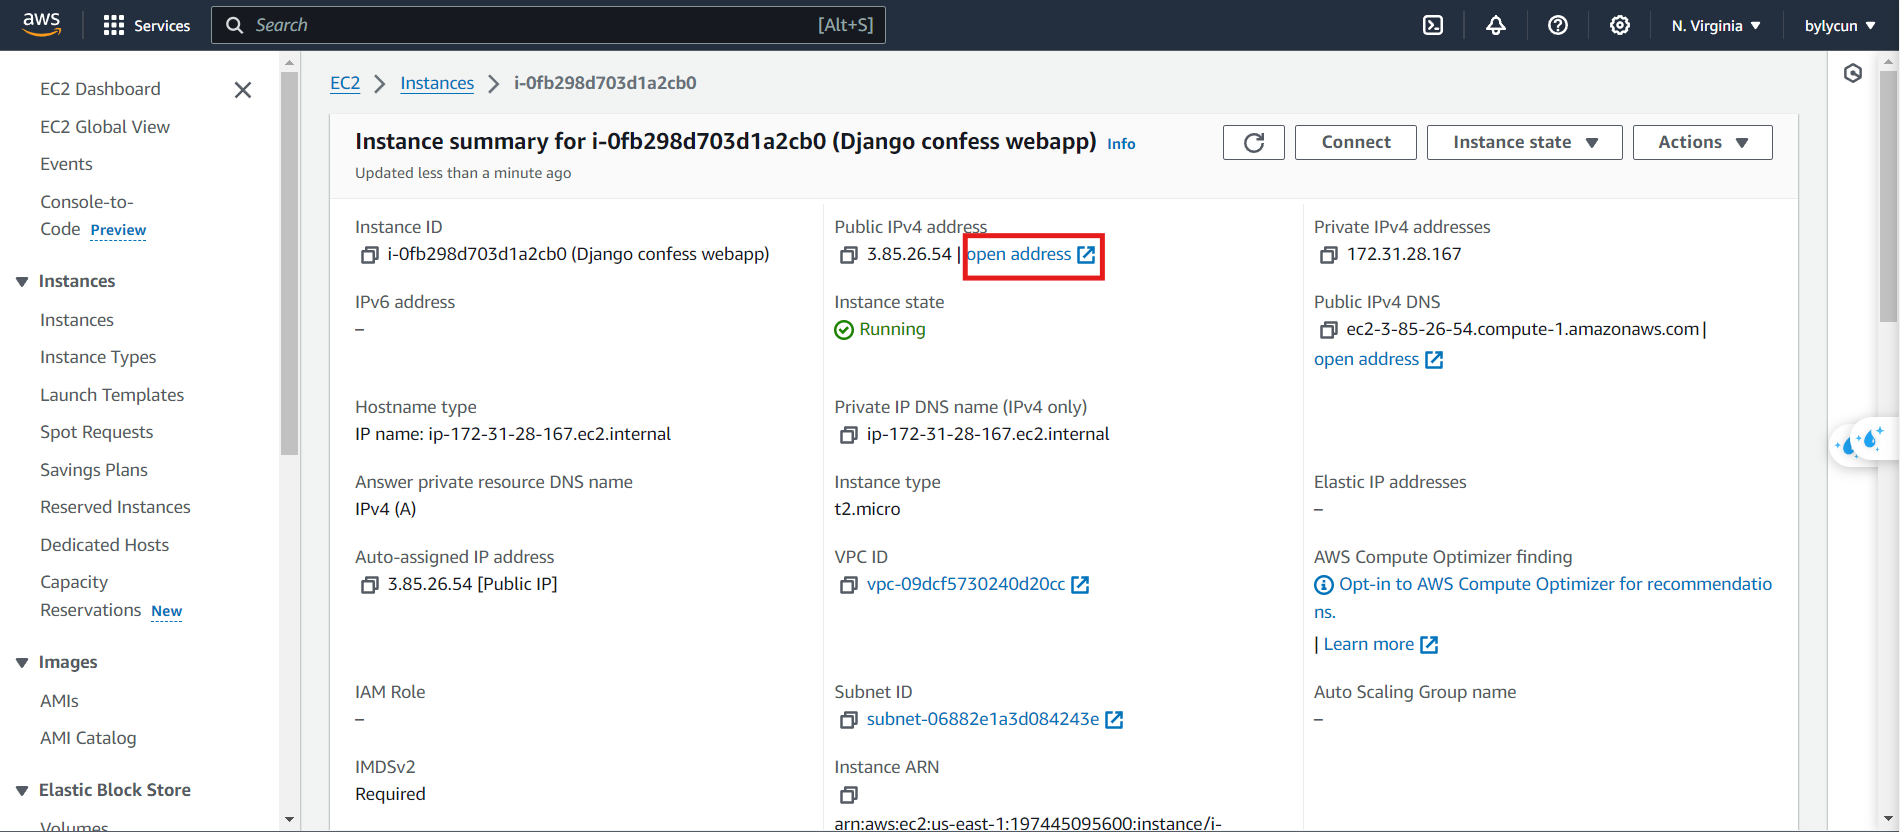 Figure 11. Access the instance details and click here.
 Figure 12. By default, the URL will be HTTPS.
 Figure 13. Remove the "s" and add :8000 to access it.
 Figure 14. You’re all set to access your webapp.
Best of luck with your deployment. ^^